Projection Mapping Guides
How to Do Projection Mapping with an iPhone or iPad: The Complete No-Laptop Guide
Learn how to build and run projection mapping from an iPhone or iPad, connect a projector, map irregular surfaces, prepare scenes, and troubleshoot a mobile setup without a laptop.
The short answer
You can do projection mapping without a laptop by running Visomapper on an iPhone or iPad with iOS 18 or later, connecting it to a projector through a compatible wired route or AirPlay, and sending the clean canvas to the external display. Import media or choose a visualizer, create a surface, move its four corners to follow the physical object, and add masks where light should not appear. Save separate scenes, arrange repeatable changes on the timeline, or use MIDI for live control. A wired connection is the simplest starting point because it removes venue Wi-Fi from the signal chain. Test the complete route before the audience arrives, store media locally for offline operation, and distinguish extended-display output from ordinary screen mirroring before mapping.
Key takeaways
- • Visomapper turns a compatible iPhone or iPad into both the mapping controller and media source, so the core workflow does not require a laptop.
- • A projector does not understand mapping geometry on its own; the app creates the warped output, while the projector simply displays that output.
- • Screen mirroring copies the device interface, while extended-display output lets the app place a clean canvas on the projector and keep controls on the iPhone or iPad.
- • Start with one rectangular surface, establish the correct connection and projector input, then add masks, multiple surfaces, effects, audio reactivity, scenes, and automation in stages.
- • For dependable shows, store media locally, lock down notifications and power settings, label adapters, and rehearse the same hardware route that will be used at the venue.
- • Projection mapping quality depends as much on projector placement, ambient light, surface texture, and careful alignment as it does on the app.
What projection mapping on an iPhone or iPad actually means
Projection mapping is the process of reshaping video so it appears to belong on a physical surface instead of remaining a normal rectangle. A projector still throws a rectangular field of light, but a mapping app changes where the useful pixels land inside that field. By moving the corners of a digital surface, masking unwanted areas, and layering several surfaces, you can fit visuals to a wall feature, sculpture, window, sign, stage flat, tabletop object, or another suitable target.
A mobile projection mapping setup moves the media server and mapping controls onto an iPhone or iPad. Visomapper supports iOS 18 and later and is designed for both device families. The iPhone is compact and easy to carry; an iPad gives you more screen area for editing surfaces and arranging a show. Neither choice changes the basic idea: the device creates the mapped image, an external-display connection carries it, and the projector enlarges it onto the object.
Projection mapping versus ordinary projection
Ordinary projection assumes that the content and target are both flat rectangles. If the projector sits off center or the target has an unusual shape, the picture looks skewed or spills beyond the intended area. A projector's keystone control can correct a basic trapezoid, but it is not a replacement for creative mapping. Projection mapping lets you define the useful region in software and, with multiple surfaces and masks, treat separate physical areas independently.
Screen mirroring versus extended display
Screen mirroring duplicates what is visible on the iPhone or iPad. It is useful for presentations and quick diagnostics, but it can expose controls, notifications, or the device's aspect ratio on the projector. Extended-display behavior gives an app a separate external canvas. In a mapping workflow, that separation is valuable because the projector can show the clean mapped output while the device remains the controller. Visomapper supports external-display operation for this purpose.
Do not assume that seeing the Home Screen on the projector proves that the mapping output is configured correctly. It only proves that some kind of connection exists. Open Visomapper, select the intended external output in the workflow, and confirm that the projector shows the canvas while the editing interface remains usable on the device. If both screens continue to show exactly the same interface, treat the route as mirroring and troubleshoot before building the show.
What you need for a no-laptop projection mapping setup
Begin with the output device and work backward. The projector must be bright enough for the room, able to focus across the target, and positioned where people will not block the beam. Its native resolution, throw distance, lens range, and available inputs influence what is possible. This guide does not prescribe a projector model because venue scale and lighting vary widely. Consult the projector manual and use its throw calculator, when available, before mounting anything.
Next, identify the connector on your iPhone or iPad and the input on the projector or receiver. Current Apple guidance describes wired display connections through an appropriate USB-C, Lightning, HDMI, or VGA adapter path depending on the device. A modern USB-C device may connect through a USB-C display adapter or a compatible USB-C-to-HDMI route. Older Lightning devices need an appropriate digital AV adapter. VGA can carry video but not HDMI-style digital audio, so plan audio separately if a legacy projector forces that choice.
- • An iPhone or iPad running iOS 18 or later with Visomapper installed
- • A projector with a suitable lens, brightness level, resolution, and available input for the space
- • A compatible HDMI, USB-C, Lightning, or other required adapter and cable route, or an AirPlay-compatible receiver
- • Stable power for the device, projector, receiver, and any powered adapter or hub
- • Locally saved images, videos, or visual assets you have the right to display
- • A rigid projector position and a clean, stable projection surface
- • Optional audio equipment, MIDI controller, spare cable, adapter, and extension power
Choose a wired connection or AirPlay
For a first iPhone projection mapping or iPad projection mapping project, a direct cable is the clearest baseline. It does not depend on a venue's Wi-Fi login page, client isolation, crowded radio channels, or a receiver disappearing from the network. Connect the correct adapter to the device, connect HDMI or the required display cable to the projector, select the matching projector input, and then open the mapping app. Keep the device powered if the session will run long.
AirPlay removes the video cable between your control position and receiver. That can make a roaming or difficult-to-wire installation easier, but it adds network and receiver dependencies. Apple's support guidance says the sender and receiving device should be on the same Wi-Fi network for common AirPlay workflows. A VPN or a network that prevents devices from seeing one another can interfere. Venues often use managed guest networks that intentionally isolate clients, so a receiver may not appear even when both devices show the same Wi-Fi name.
Choose based on the failure modes you can control. A cable can be pulled or require a long run; wireless video can be affected by network policy and congestion. For a fixed installation, secure the cable and strain-relieve the adapter. For AirPlay, use a network and receiver you are authorized to configure, disable automatic network switching where appropriate, and test while the room is occupied if possible. Keep a wired fallback when the show matters.
Create your first projection map step by step
Place the projector before editing. A mapping can compensate for an angled image, but software cannot prevent a moving stand, fix a blocked beam, or create focus where the lens cannot reach. Aim the projector so the full target lies within the projected field, focus it, and make only the basic projector adjustments needed for a stable source. Avoid repeatedly changing both projector keystone and app geometry; two moving coordinate systems make troubleshooting confusing.
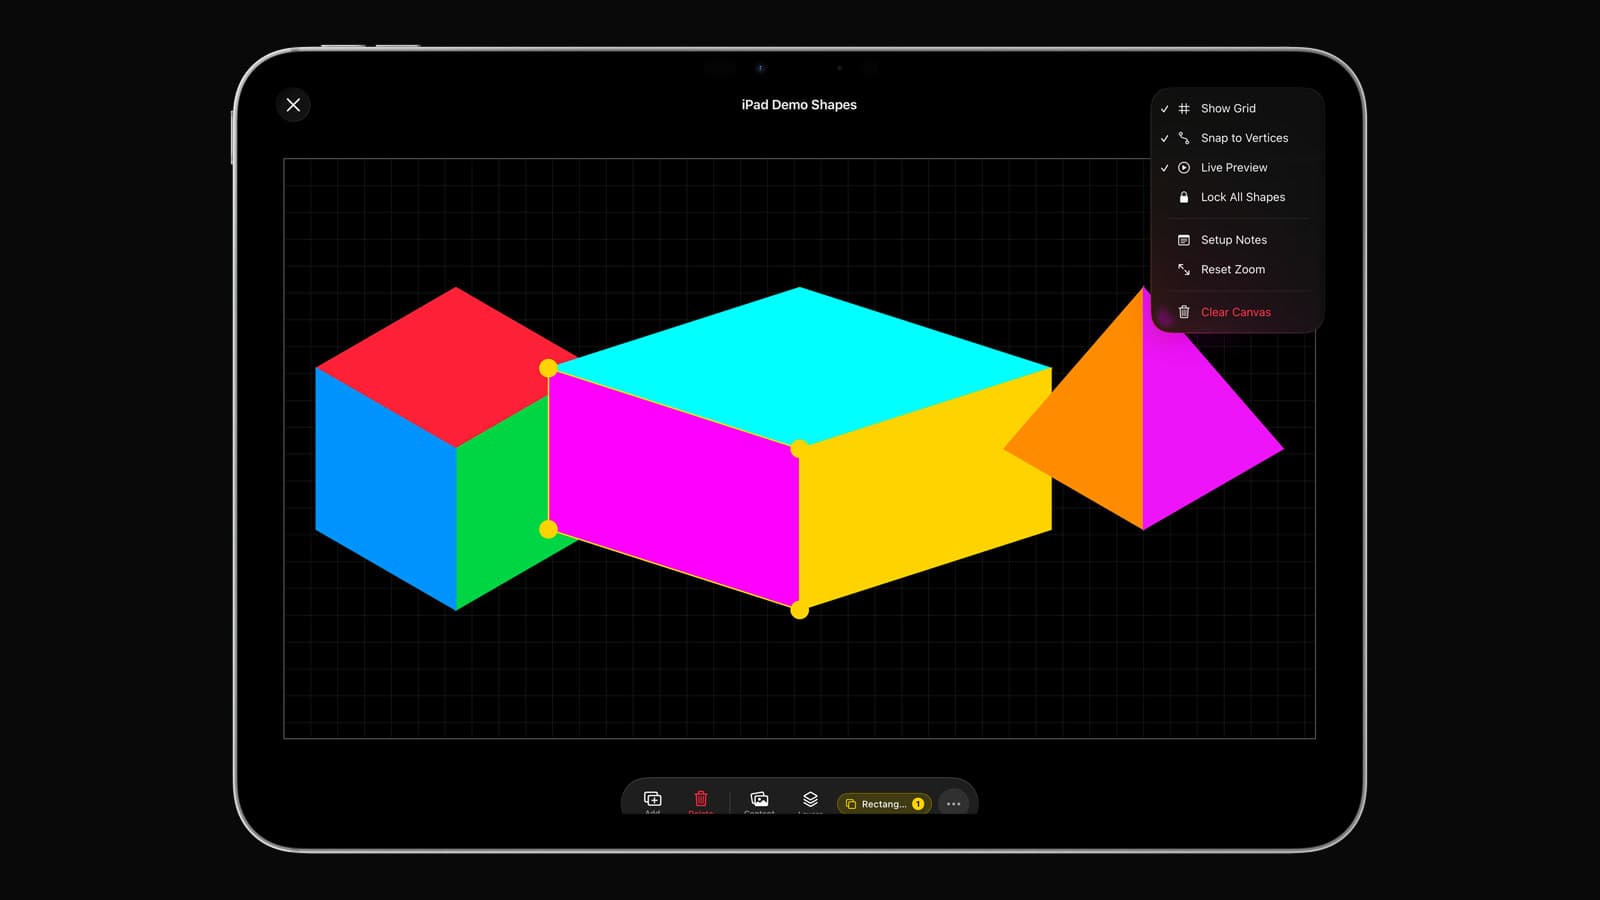
In Visomapper, start a project and bring in one piece of media or select a built-in visualizer. Use a bright alignment image when your final content is dark. Create a single surface and locate its four corner controls. Move each digital corner until the visible content meets the corresponding corner of the physical target. Work clockwise and repeat the circuit, because moving one point can change how nearby edges look.
Judge the edges from the audience position as well as from your control position. A mapping that looks perfect beside the projector may reveal spill when seen straight on. Use architectural seams, painter's tape marks, or clearly defined object edges as references, provided the venue permits them. Zooming the editing view can help with fine placement, but periodically look at the entire composition to catch a surface that has been stretched into an implausible shape.
Save the project after the first clean alignment. Then play the actual media and watch all the way through. Content can contain bright frames near its end that reveal spill invisible during a dark opening. Check motion along every edge. If text or faces appear unnaturally stretched, revisit the corner positions or adapt the content rather than forcing a severe warp. Mapping fits pixels to geometry; it does not restore visual information lost through an extreme viewing angle.
- • Mount, aim, and focus the projector before creating geometry.
- • Verify that the projector is receiving Visomapper's intended external canvas, not merely a mirrored control screen.
- • Start with one surface and a high-contrast alignment image.
- • Match all four corners to the physical target, then inspect each edge from the audience viewpoint.
- • Save a baseline scene before adding creative effects or extra surfaces.
- • Run the final media from beginning to end and correct any newly visible spill or distortion.
Use corner warp, masks, and multiple surfaces deliberately
Corner warping solves the outer shape of a mapped plane. A mask solves a different problem: hiding pixels inside or around that plane. Use masks when a rectangular or four-corner surface includes a doorway, window, logo, person-sized opening, reflective element, or another region that should remain dark. Keep masks as simple as the target allows. An intricate outline may look impressive in the editor but becomes hard to repair if the projector shifts slightly.
Multiple surfaces let one projector composition address distinct parts of an object. A simple building facade might use one surface for a central panel and separate surfaces for two side sections. A stage set might use individual surfaces for flats at different angles. Create and align each surface independently, name it by its physical location, and temporarily use different solid colors so overlaps and gaps are obvious. Once geometry is correct, assign the intended media or visual treatment.
Layer order matters when surfaces overlap. Decide which mapped region should be visually in front and check whether a mask is clearer than relying on one layer to cover another. Resist creating dozens of tiny pieces before the visual concept requires them. Every extra point increases setup time and gives you another alignment to maintain. A few well-organized surfaces are often more adaptable when the projection target must be rebuilt at a new venue.
Build looks with imported media, visualizers, effects, and audio reactivity
Imported images and video are useful when the visual sequence has been designed in advance. Prepare media at an aspect ratio and resolution appropriate to the composition, but remember that the mapping surface will reshape it. Put essential subjects inside a safe area, avoid tiny text, and test gradients and dark tones on the real projector. Projection blacks are created by sending little or no light; they cannot become darker than the surface and ambient room lighting allow.
Visomapper also includes visualizers and live effects. These are useful for generative looks, music-driven performances, and variations that do not require rendering a new movie. Add one effect at a time and keep a saved clean version of the scene. A dramatic stack of effects can make alignment difficult to judge, so return to the calibration scene whenever you suspect the projector or target has moved.
Audio reactivity can connect visual parameters to sound, turning music or environmental audio into motion. Treat it as a controllable system rather than a magic “sync” switch. Choose an audio source intentionally, obtain the needed microphone permission, and confirm that the device can hear a useful signal from its operating position. A phone placed beside a loudspeaker may receive a very different balance than the audience. Start with restrained response, then increase intensity while watching for visuals that become tiring or unreadable.
Turn a mapping into a show with scenes, timeline cues, and MIDI
A scene is a saved visual state. Use scenes to separate the opening look, transitions, main segments, intermission image, emergency hold, and closing frame. Give each scene a name that a second operator could understand under pressure. “Blue idle,” “Artist intro,” and “Blackout” are safer than “Scene 7.” Build and save a calm fallback scene that can remain on screen if the performance pauses unexpectedly.
The timeline is appropriate when changes should happen in a repeatable order. Arrange scene changes or visual moments, then rehearse from the beginning and from likely restart points. A timeline can reduce live tapping, but automation is only helpful when the source material and event timing are stable. For a speaker-led presentation or improvised performance, manual cues may be more robust than a rigid sequence.
MIDI provides tactile control for parameters or cues without requiring every change to be made on glass. Map a small, documented set of controls first: scene advance, blackout, effect intensity, or another essential action. Label the hardware and avoid assigning one physical control to several unrelated outcomes. Confirm the controller remains connected after the iPhone or iPad locks, changes power state, or reconnects to external video.
Plan a vertical projection mapping composition
Vertical mode is useful for portrait-oriented walls, columns, retail displays, doorways, narrow stage pieces, and social-video-shaped source material. Rotate and mount the projector only when its manufacturer permits that orientation and ventilation remains unobstructed. If physical rotation is not appropriate, keep the projector level and place a portrait composition inside the available landscape raster.
Set the project orientation early. A late switch can change how source media fits and may require new alignment. For a tall surface, place the projector far enough away and choose a lens position that covers both top and bottom while remaining in focus. Watch for viewers casting shadows near the lower section. The mobile device can remain in a comfortable control orientation while the external canvas uses the format needed by the installation.
Prepare Visomapper for an offline venue
Visomapper can operate offline, which is valuable in theatres, galleries, pop-ups, outdoor sites, and event rooms with restricted internet. Offline capability does not automatically make every asset available. Download or import the media needed by the project before leaving a trusted connection, then place the device in the same connectivity state expected at the venue and open every project and scene. A cloud placeholder is not a local file.
Before doors open, reduce avoidable interruptions. Charge the device, arrange continuous power, enable a suitable Focus mode, and disable notifications that could appear or interrupt audio. Check auto-lock behavior and display brightness without changing controls you do not understand. Keep enough free storage for the project and normal system operation. An offline rehearsal should include disconnecting from the internet, relaunching the app, reopening the project, and playing the complete sequence.
Troubleshoot common iPhone and iPad projection mapping problems
Troubleshooting is fastest when you follow the signal in order: power, physical connection or network, projector input, operating-system output, app output, mapping geometry, and source media. Change one variable, observe the result, and record what restored the image. Randomly swapping several items can make a temporary recovery impossible to explain or repeat.
The projector says “No signal”
Confirm the projector is on the exact input used by the cable. Reseat the cable at the projector, then the adapter, then the device. If a powered hub is involved, verify its power. Unlock the iPhone or iPad and check for an accessory prompt. Test with the shortest known-good route available, removing switchers or extenders temporarily. Apple's cable guides also recommend reconnecting the display and, if needed, power-cycling it.
The projector shows the app controls
You are likely seeing ordinary screen mirroring instead of the intended separate output. Stop generic mirroring where appropriate, reopen the app after the external display is connected, and select or confirm Visomapper's external-display workflow. On supported iPad configurations, system window placement can also affect what appears on each display, so verify the current Apple guidance for your model and operating-system version.
The AirPlay receiver does not appear
Check that both devices are on the same network and that the receiver is awake and allows AirPlay. Turn off an unnecessary VPN and ask the venue administrator whether wireless clients are isolated. Do not defeat a venue's security controls. If discovery remains unreliable, move to the planned wired fallback rather than consuming rehearsal time on an unknown network.
The image is the wrong size, cropped, or surrounded by unused space
First confirm the projector's aspect ratio, overscan, zoom, and scaling settings. Then check the external canvas and source-media fit in Visomapper. Avoid correcting an app-fit problem with projector keystone or correcting an input-scaling problem by distorting every mapping surface. Establish a clean full-frame signal first, then align the surface geometry.
The mapping no longer lines up
Look for physical movement before editing points. A bumped projector, flexing stand, shifted scenic panel, or changed focus can move every edge. Restore and secure the physical setup if possible, then load the calibration scene and refine the geometry. If only one area changed, inspect that target before rebuilding the whole map.
Video appears but audio does not
Check the intended audio destination and volume at every stage. Confirm the media contains an audio track, the device is not muted by an inappropriate show setting, and the adapter path supports audio. Apple's adapter guidance notes that VGA does not carry audio, so a VGA route needs a separate audio plan. If HDMI reaches a projector, verify that its audio output or connected sound system is selected and unmuted.
Media is unavailable without internet
Reconnect only long enough to download or import an authorized local copy, then verify it in airplane mode or with Wi-Fi disabled as the venue permits. Do not assume an item visible in a file browser is stored on the device; cloud services can show placeholders. Reopen Visomapper after the offline check and inspect every scene that references the asset.
The no-laptop projection mapping checklist
The best time to discover a weak adapter, missing file, mirrored interface, or untested cue is before travel. Use this final pass for every Visomapper project, even after the workflow feels familiar. A short, consistent checklist protects the creative work from ordinary technical mistakes.
- • Confirm the iPhone or iPad runs iOS 18 or later and opens the intended Visomapper project.
- • Store every required media asset locally and verify the full project offline.
- • Match the device connector, adapter or hub, cable, receiver, and projector input.
- • Provide continuous power and a safe, secured cable path.
- • Verify the clean external canvas and distinguish it from screen mirroring.
- • Lock the projector and target positions before aligning corners and masks.
- • Check all surfaces with a calibration scene from the audience viewpoint.
- • Play every video, visualizer, live effect, and audio-reactive look through its expected duration.
- • Rehearse scenes, timeline cues, MIDI controls, blackout, and recovery after relaunch.
- • Enable an appropriate Focus mode, control notifications, and document the startup and shutdown sequence.
- • Carry a known-good spare cable or adapter where practical and keep a wired fallback for wireless shows.
- • Confirm media rights, venue permission, electrical safety, accessibility considerations, and an authorized operator.
Frequently asked questions
Can I really do projection mapping with only an iPhone and a projector?
You can run the mapping and media from an iPhone with Visomapper, but you still need stable power and a compatible USB-C or Lightning adapter with HDMI, or an AirPlay receiver and suitable network. Secure the projector, verify its external display, and then create the geometry.
Is an iPad better than an iPhone for projection mapping?
Both support the mobile workflow. An iPad offers a larger editing area for surface work and live control, while an iPhone is more compact. External-display and connector behavior can differ by model, so test the exact device, adapter, receiver, and projector you will use.
Does Visomapper need internet access during a show?
Visomapper supports offline operation when the project and imported assets are stored locally. AirPlay still needs a working local network even without internet access; a wired output avoids that dependency. Disconnect from the internet and run the complete project before the venue call.
Can I connect an iPhone or iPad directly to a projector with HDMI?
Yes, with a connection path compatible with the device and projector. Apple documents USB-C and Lightning display adapters for different models. Connect the adapter or hub to HDMI, select that projector input, and verify Visomapper's external canvas. Third-party hubs can differ in video, charging, and audio support.
Can I use AirPlay for projection mapping?
Yes. The sender and receiver need a compatible, permitted network path, and venue Wi-Fi may block discovery. Confirm that Visomapper sends a clean external canvas rather than generic full-screen mirroring. Rehearse with the real receiver and keep a wired fallback for an important show.
What is the difference between projector keystone and corner mapping?
Projector keystone corrects the overall rectangular image. Visomapper's corner mapping defines an individual creative surface inside that output and can work with masks and other surfaces. Establish a stable base image with projector controls, then build the mapped composition in the app.
Can one projector map several objects?
Yes, if the objects fit within the projector's field, focus range, and usable brightness. Create and name multiple surfaces, align each to its target, and use calibration colors and masks to find overlaps or spill. Objects at very different depths may not all remain sharp.
Can I control a Visomapper show live?
Yes. Visomapper includes live effects, audio reactivity, scenes, timeline features, and MIDI. Use scenes for saved looks, the timeline for repeatable cues, and MIDI for tactile control. Label essential actions and rehearse fallback and blackout cues.
Sources and further reading
- Visomapper product website — Current product overview and supported creative workflow.
- Visomapper on the App Store — Current compatibility and product feature listing.
- Apple Support: Connect iPhone to a display with a cable — Official connection sequence and adapter categories for iPhone display output.
- Apple Support: Connect iPad to a display with a cable — Official wired-display guidance for USB-C and Lightning iPad models.
- Apple Support: Stream video and audio from iPhone with AirPlay — Official AirPlay network, streaming, mirroring, and troubleshooting guidance.
- Apple Support: Stream video and audio from iPad with AirPlay — Official AirPlay requirements and screen-mirroring controls for iPad.
- Apple Support: Get help with Digital AV adapters — Official adapter troubleshooting and the distinction between HDMI and VGA audio support.
Ready to map?
Build your next projection from iPhone or iPad.
Download Viso and keep the mapping controls on your device while the projector receives the canvas.
Download Viso on the App Store